Inventory management
Inventory is the working home for your gear. It keeps list browsing, quick actions, labels, and item history close together without forcing you into the item detail screen every time.
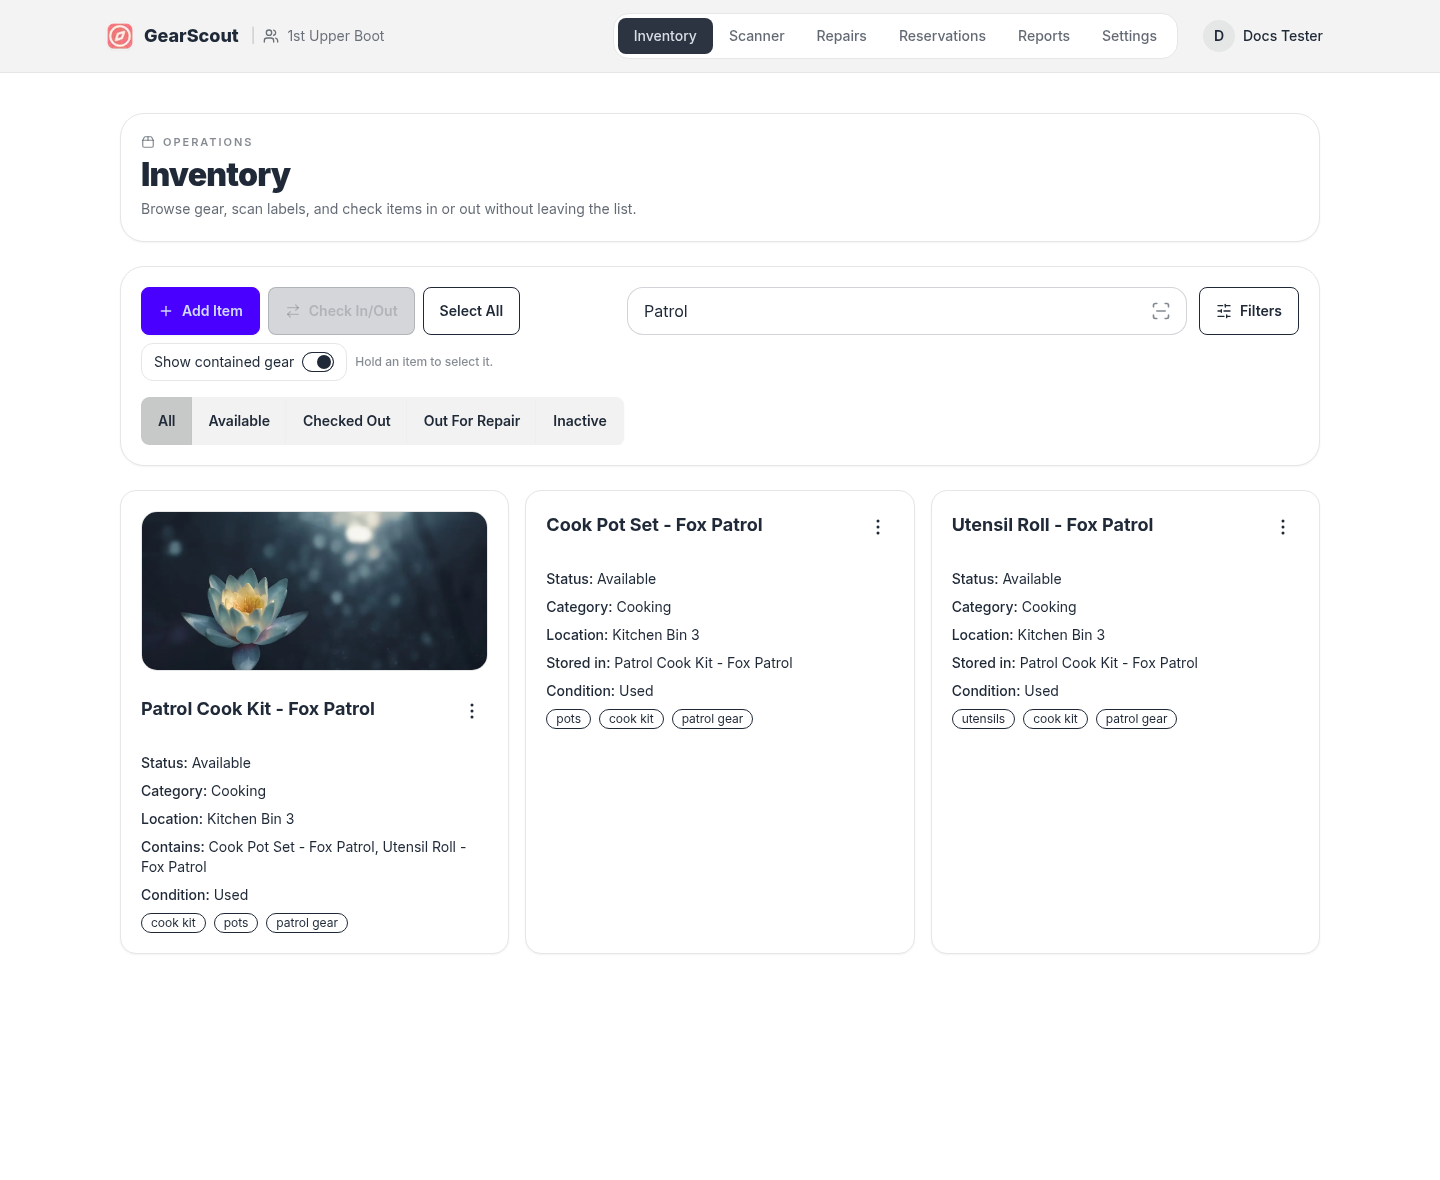
Viewing inventory
Use the All, Available, Checked out, Out for repair, and Inactive views, plus filters, the scanner shortcut, and the 3-dot menu to work through your gear list.
Add gear
- 1Open Inventory and choose Add Item.
- 2Fill in the core details such as name, category, location, quantity, and condition.
- 3Add optional tags, notes, and public-item toggles if you want non-members to check gear in or out or submit repair tickets from the label page.
- 4Save the record to return to the list or continue working in the item detail page.
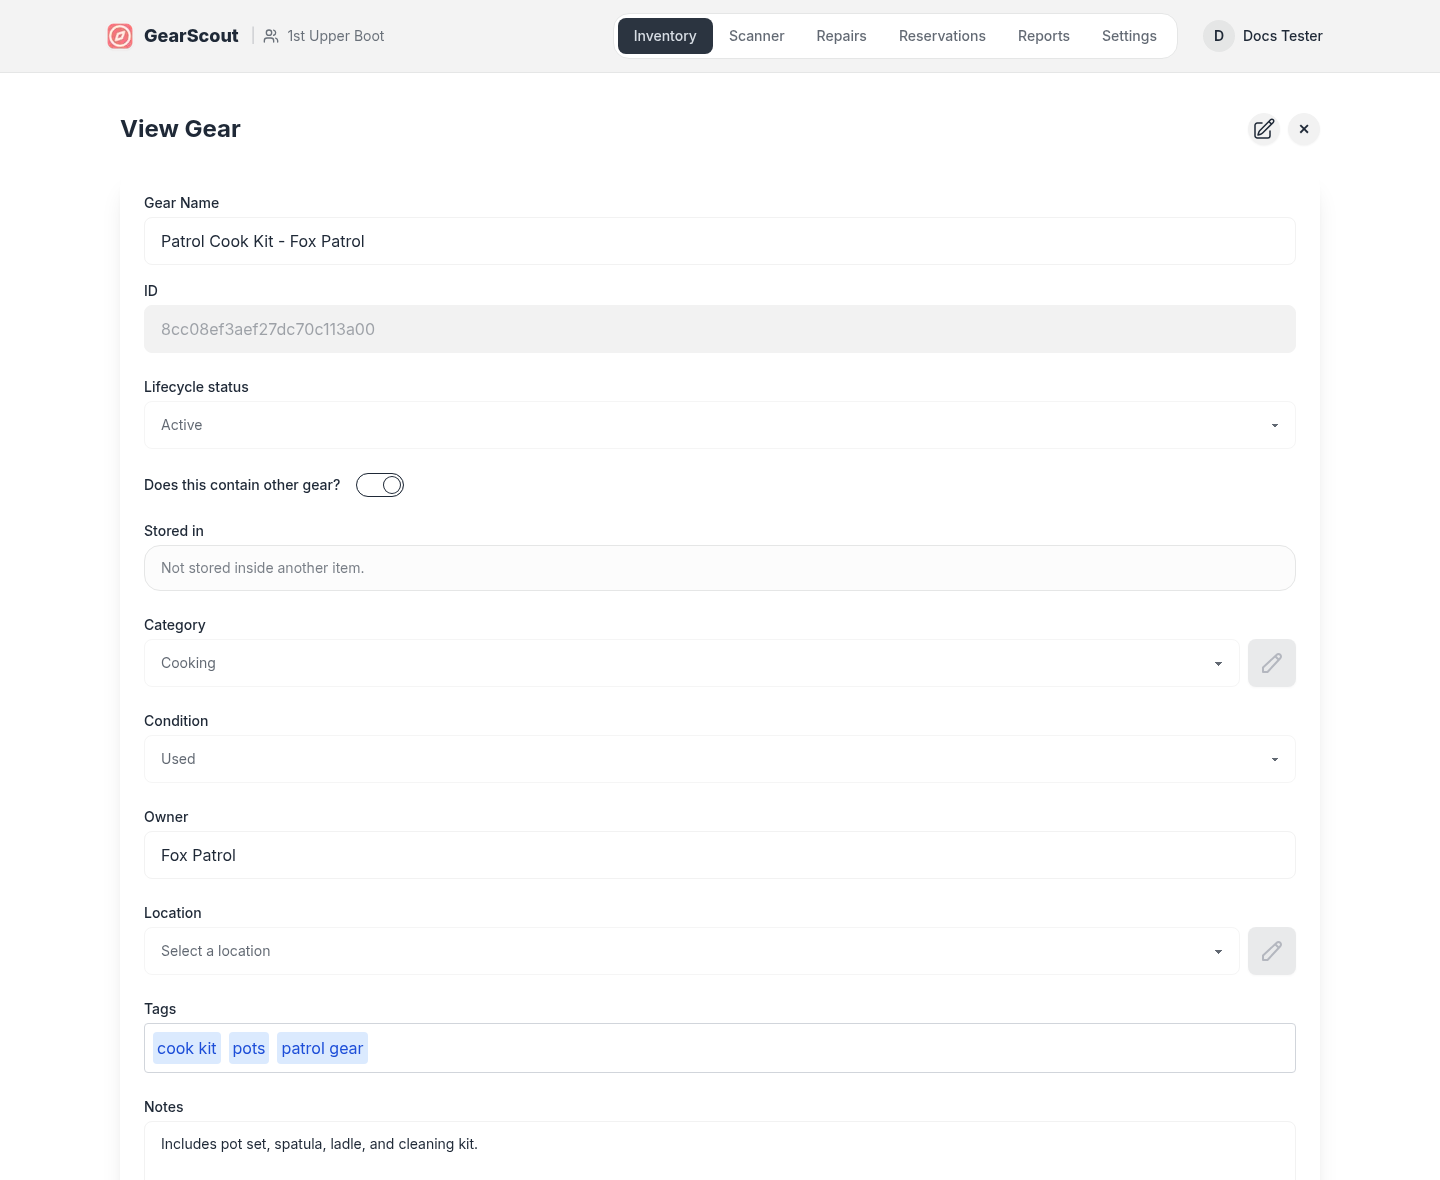
Item details
Open an item to review the full record, upcoming reservations, repair history, and access history.
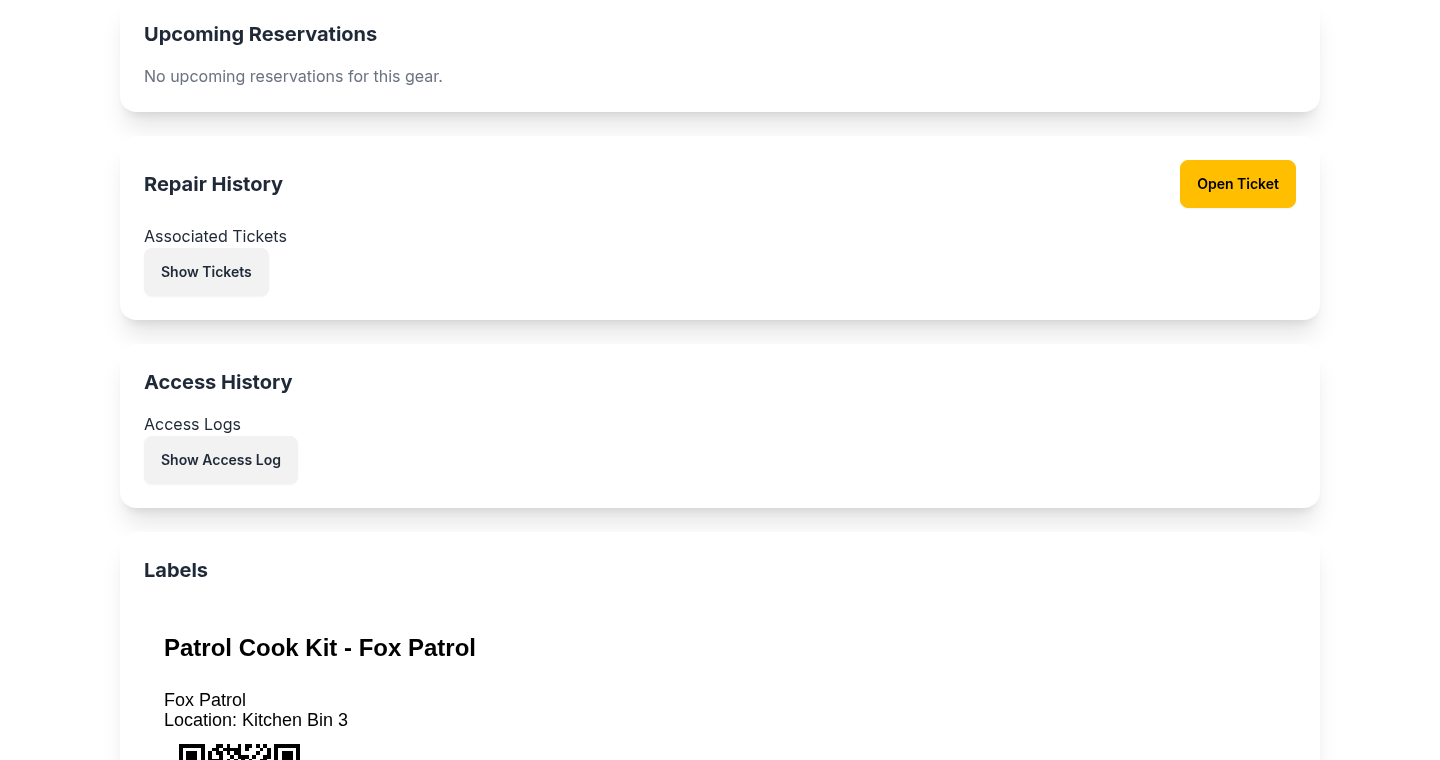
History on the gear record
The gear detail page keeps upcoming reservations, repair history, and access history together so you can understand an item before making changes.
Update or delete gear
Use the 3-dot menu from the inventory list or the edit icon on the item page to switch into edit mode. Gear records now include lifecycle status, cover-photo selection, contained-gear setup, and verification checklist definitions alongside the original fields.
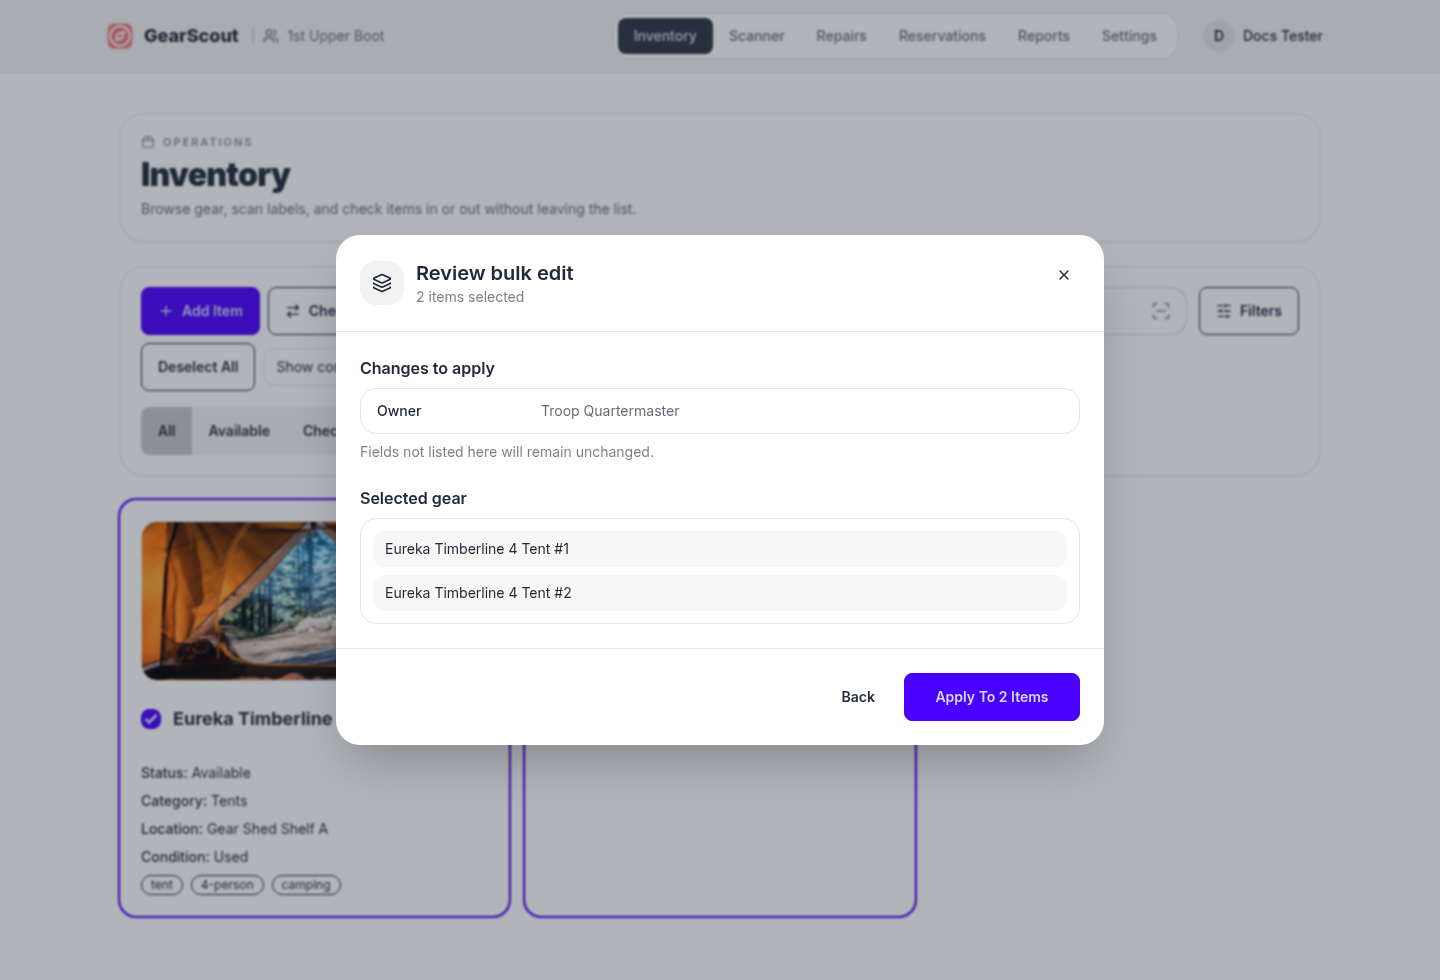
Bulk edit selected gear
Select one or more inventory cards, then choose Bulk edit. You can replace the category, storage location, tags, owner, or condition across the selection. Check only the fields you intend to change; every unselected field stays as it was.
Review the exact changes and item names before applying them. Selecting an empty category, location, or owner clears that value, and selecting Tags with an empty list removes all tags from the selected gear.
Review a bulk edit
The review step shows the fields that will change and every affected item before the update is applied.
Gear photos
Add one or more photos to a gear record so people can confirm they are working with the right item before they check it out, return it, or assign it to a reservation.
You can also choose a cover photo for the item. That image becomes the main visual reference on the gear record and in inventory views where a quick visual check helps.
Duplicate a gear item
Use Duplicate from the 3-dot menu when you want to create a new item based on an existing record. GearScout copies the ordinary inventory fields, photos and cover choice, public-item settings, quantity settings, purchase details, lifecycle status, container capability, and verification checklist into a new draft so you can change only the parts that differ.
Copied photos are stored independently, so deleting the source item does not remove the duplicate's images. Live activity and relationships are not copied: the duplicate gets a new ID and no checkout state, parent container, contained items, reservations, repair tickets, or access history.
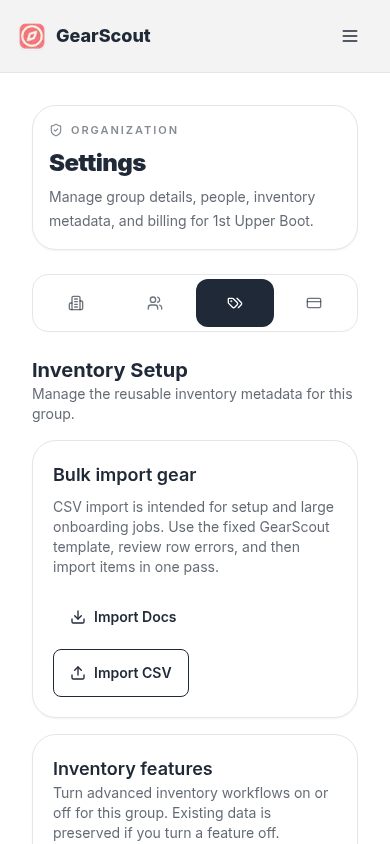
CSV gear import
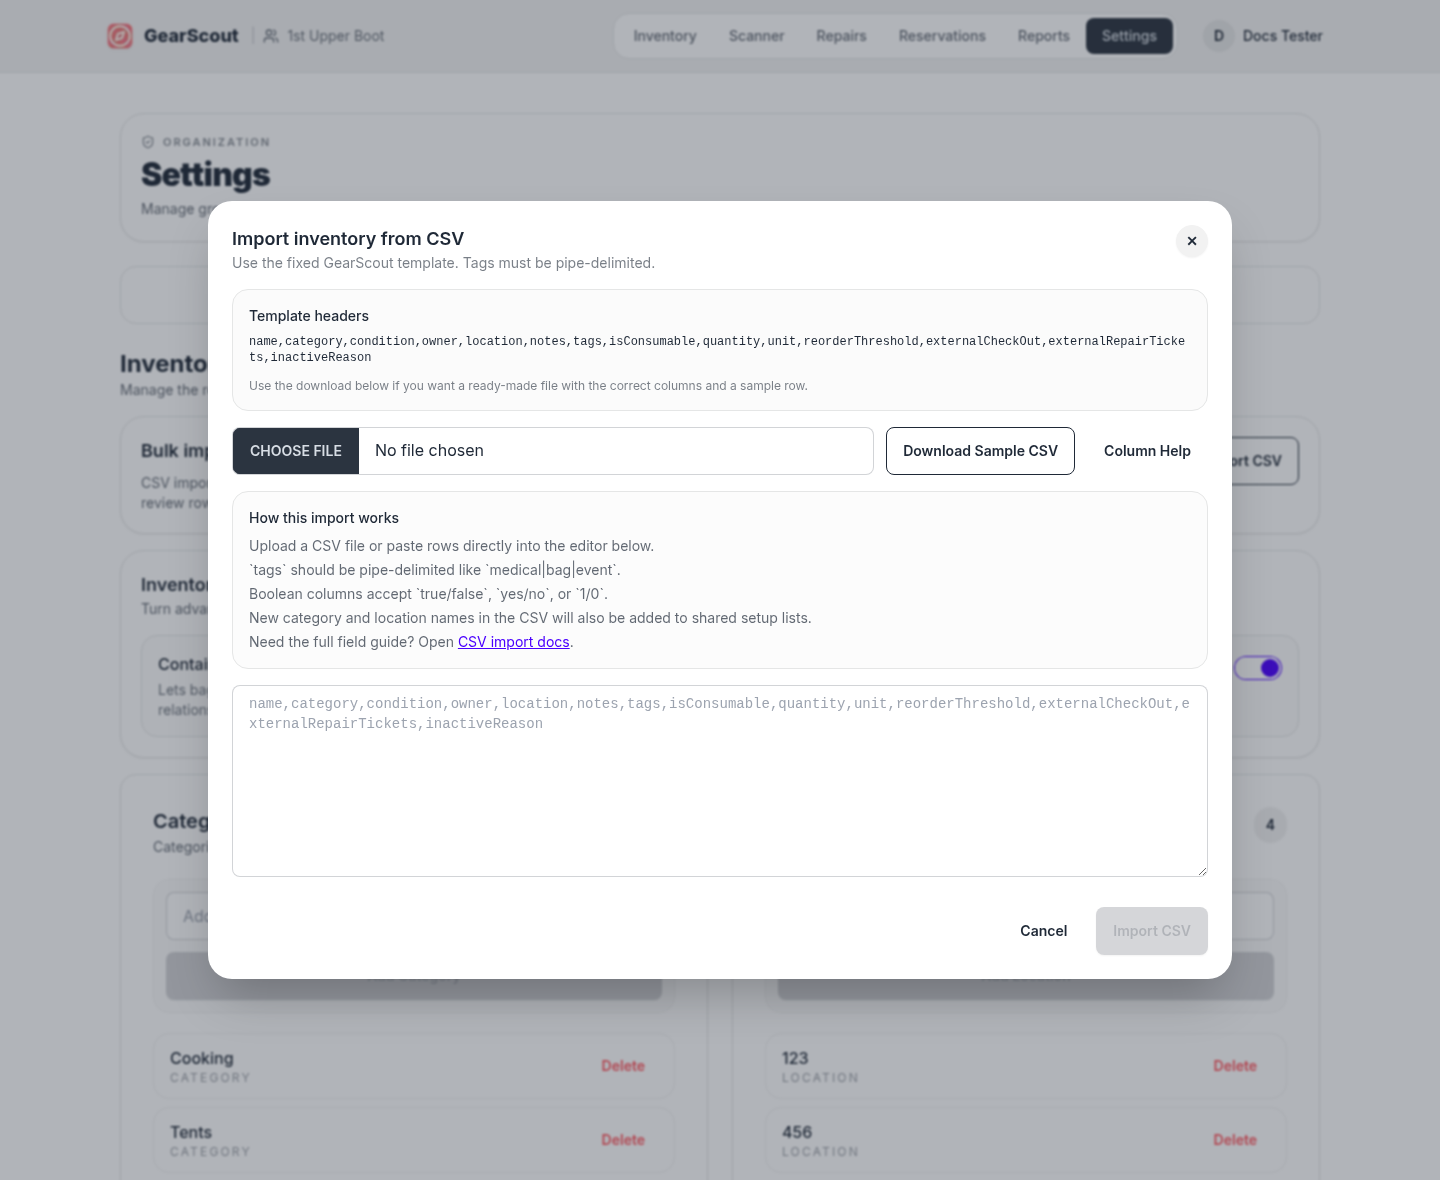
CSV import lives under Settings > Inventory. It uses a fixed GearScout template, preview rows, row-level validation, a downloadable sample CSV, and direct help links from the modal before anything is created. If the importer has inventory setup access, new category and location names from the file are also added to the shared setup lists automatically.
CSV import preview
Upload a CSV or paste rows directly, then fix any row errors before importing.
CSV column reference
Boolean columns accept true/false, yes/no, or 1/0.
| Column | Required | Meaning |
|---|---|---|
| name | Yes | The gear item name shown throughout GearScout. |
| category, location, owner, condition | No | Optional inventory details used for filtering and display. |
| notes | No | Free-form notes saved onto the gear record. |
| tags | No | Pipe-delimited tags such as medical|bag|event. |
| isConsumable | No | When true, the item is tracked by quantity instead of check-in/out. See Consumables. |
| externalCheckOut | No | When true, anyone who scans the label can check the item in or out without signing in. Defaults to false. |
| externalRepairTickets | No | When true, the public item page shows a repair ticket action for non-members. Defaults to true when omitted. |
| quantity, reorderThreshold | No | Numeric stock values for consumable items. reorderThreshold is stored for reporting; quantity changes are usually made in the app after import. |
| unit | No | The unit label for quantity, such as item or box. |
| inactiveReason | No | Optional inactive bucket value. Supported values are lost, decommissioned, or archived. |
Status buckets
Inventory includes an All view plus Available, Checked out, Out for repair, and Inactive buckets. Repair and checkout states are derived automatically, while inactive items can be marked Lost, Decommissioned, or Archived.
Contained gear is hidden by default in the All, Available, and Checked out views so the list stays focused on top-level bags, cases, and kits. You can turn it on when you want the full list, and GearScout always shows contained gear in Out for repair and Inactive so nothing is hidden in exception states.
Delete from the item detail page when you are removing a mistaken or obsolete record. If the item has useful history, consider leaving it in place instead.
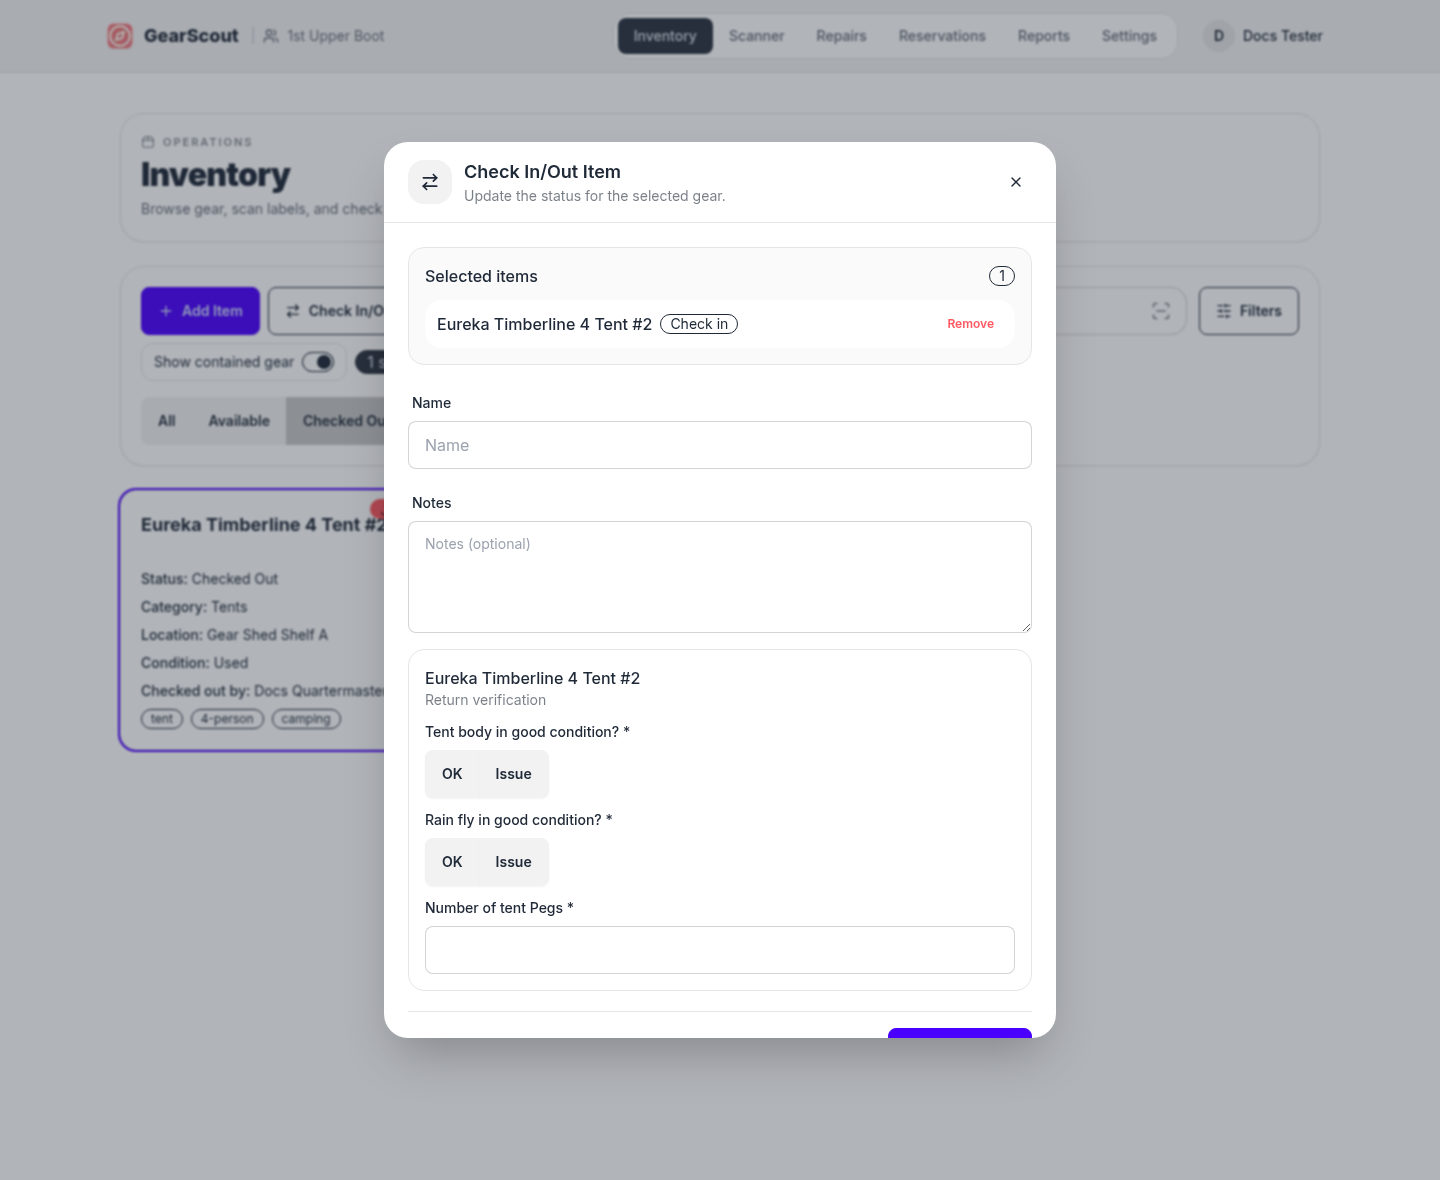
Check gear in or out
Select one or more items from the inventory list, then review the bulk action modal before submitting. GearScout shows contained gear that will move with the selected item and flags return issues before check-in is confirmed.
Scanner
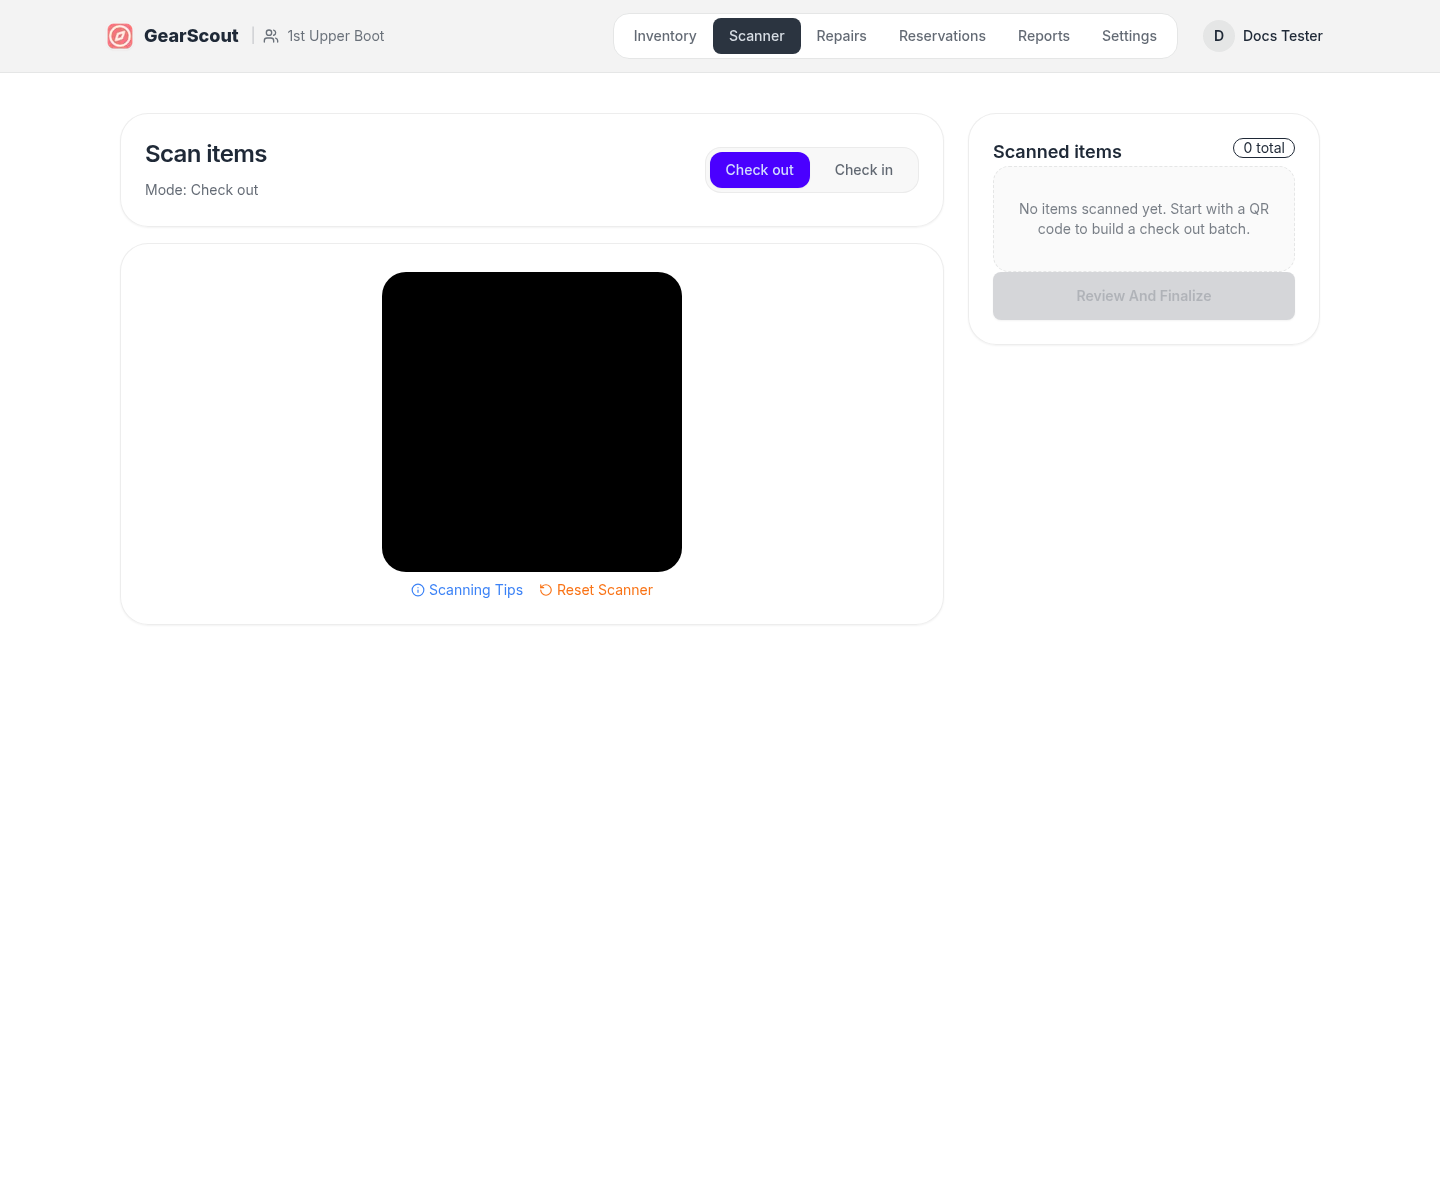
The scanner is designed to work on both mobile and desktop. On mobile it stays camera-first; on desktop it keeps the review panel visible so you can build a batch before finalizing.
QR scanning
Scan labels to build a check-in or check-out batch, then review the scanned items list before finalizing.
Selection tips
Bulk check-in and check-out start from selected items in the inventory list. GearScout now determines whether each item is being checked in or checked out automatically based on its current state.
Pooled gear adds a quantity beside the action. Enter how many units are moving; reservation-based actions preload the quantity assigned to the reservation, while an ordinary checkout shows what is available right now. GearScout protects quantities needed by a reservation already in progress and warns about reservations starting within the next 24 hours without blocking the checkout.
Verification checklists
Verification checklists help your group confirm that gear came back complete and in acceptable condition. The feature must be turned on for your group under Settings > Inventory. When it is enabled, each gear record can define its own checklist on the item detail page in edit mode.
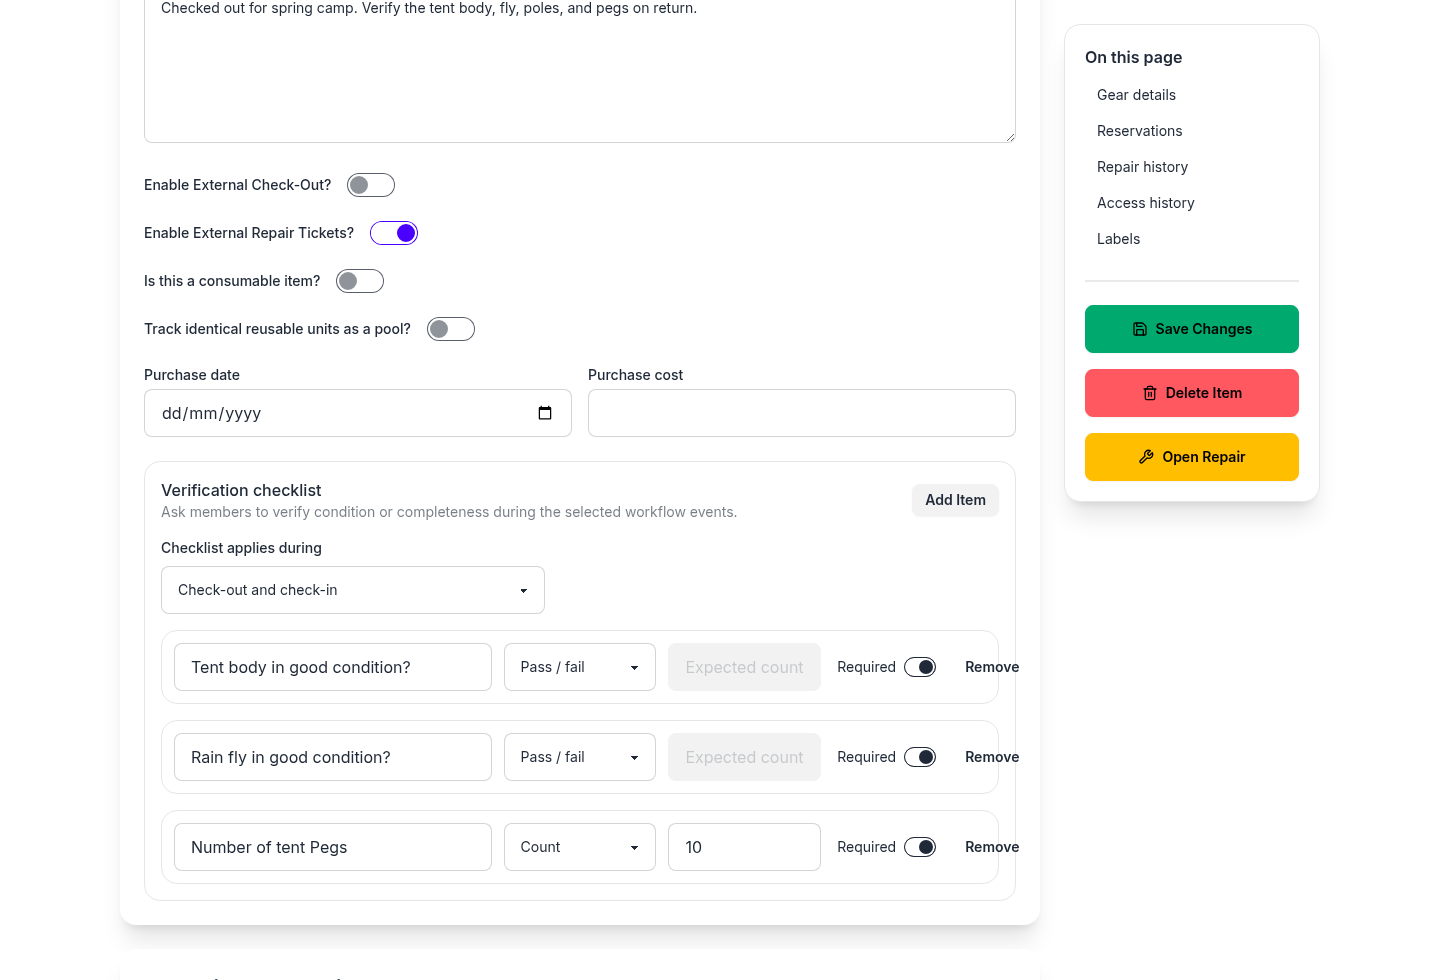
Checklist items support three response types: Pass / fail (OK or issue), Count (with an optional expected count), and Text. Mark an item as Required when it must be answered before the configured check-out or check-in handoff can be submitted.
Choose whether each gear checklist applies at check-out, check-in, or both. Required items block the applicable action until they are filled in. If a return shows an issue, a count below the expected value, or fewer items than were recorded at checkout, GearScout shows warnings before the user confirms. Those warnings and the submitted responses are saved on the relevant access-history record. When a container moves, applicable checklists from contained gear are grouped by item in the same workflow.
The same checklist can apply on the public item page when external check-out is enabled. The configured timing determines whether it appears when a visitor checks the item out, checks it back in, or during both handoffs.
Configure a verification checklist
Build pass/fail, count, and text checks, mark required responses, and choose whether they run at check-out, check-in, or both.
Public item settings
On each gear record, two toggles control what unsigned visitors can do after scanning a label. Found-item reporting is always available on the public page; these settings control check-in/out and repair tickets.
| Setting | Default | What it does |
|---|---|---|
| Enable External Check-Out | Off | Shows Check in/out item on the public item page so visitors can record who has the gear without a GearScout account. Signed-in members always see this action. |
| Enable External Repair Tickets | On | Shows Submit repair ticket on the public item page for non-members. Turn it off for items where you only want internal repair logging. |
For step-by-step flows on the public page, see Using gear labels.
Equipment within equipment
Non-consumable gear can now be stored inside other gear. Use the container area on the item record to build a packing list for bags, cases, or kits. Checking the parent item in or out can also move the contained gear with it.
Child gear is managed from the parent record. On the child item you can still see where it is stored and jump back to the parent, but you make the actual packing-list changes from the container itself.
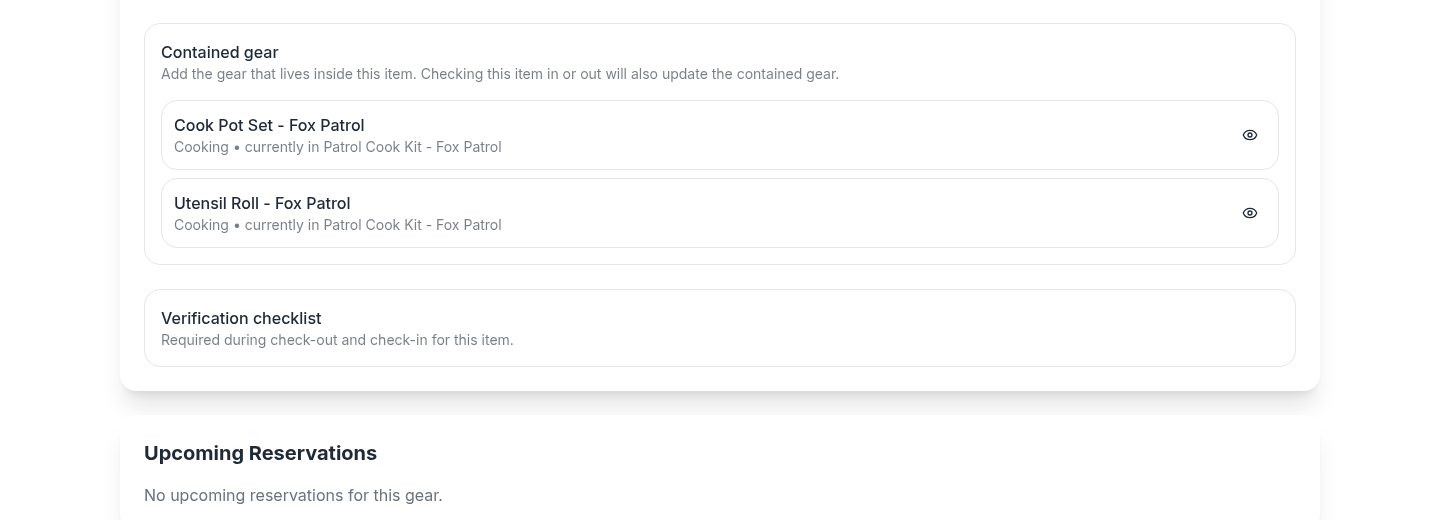
Contained gear on the item record
Container-style items keep their packing list directly on the gear record so quartermasters can see what belongs inside and jump straight to each contained item.
Categories and locations
Categories and locations are now maintained from Settings instead of being tucked inside the inventory form.
Open Settings > Inventory to add or remove shared categories and locations. Delete actions ask for confirmation before the change is applied.
Labels and bulk labels
Labels connect physical gear back to GearScout. Print one from the item record, or generate them in bulk when you are labeling a large set.

Consumables and stock
Mark an item as a consumable when you track it by quantity rather than who has it checked out. On the gear record, turn on Is this a consumable item? in edit mode, then set the current Quantity and Unit (for example box or each).
Consumables do not use the normal check-in/out workflow. They cannot be stored inside other gear or act as containers. When stock changes, open the item and use Update quantity to add, remove, or set the amount on hand.
CSV import supports isConsumable, quantity, unit, and reorderThreshold so you can load initial stock levels in bulk. Reports include consumable quantity and unit for inventory exports.
Pooled reusable gear
Use Track identical reusable units as a pool when several interchangeable items can share one record—for example, 8 pairs of ice cleats or 20 folding chairs. Set a total quantity and unit, then GearScout tracks how many units are checked out. Individually tracked gear continues to work exactly as before.
Reservations commit only the requested quantity for their date and time window. Overlapping reservations cannot exceed the pool, but non-overlapping events can reuse the full quantity. Inventory cards keep the day-to-day summary simple with Total and Checked out; date-window availability appears while planning a reservation.
Pooled quantity and purchase details
One reusable pool records its total units, unit name, purchase date, and per-unit cost without creating a separate record for every identical item.
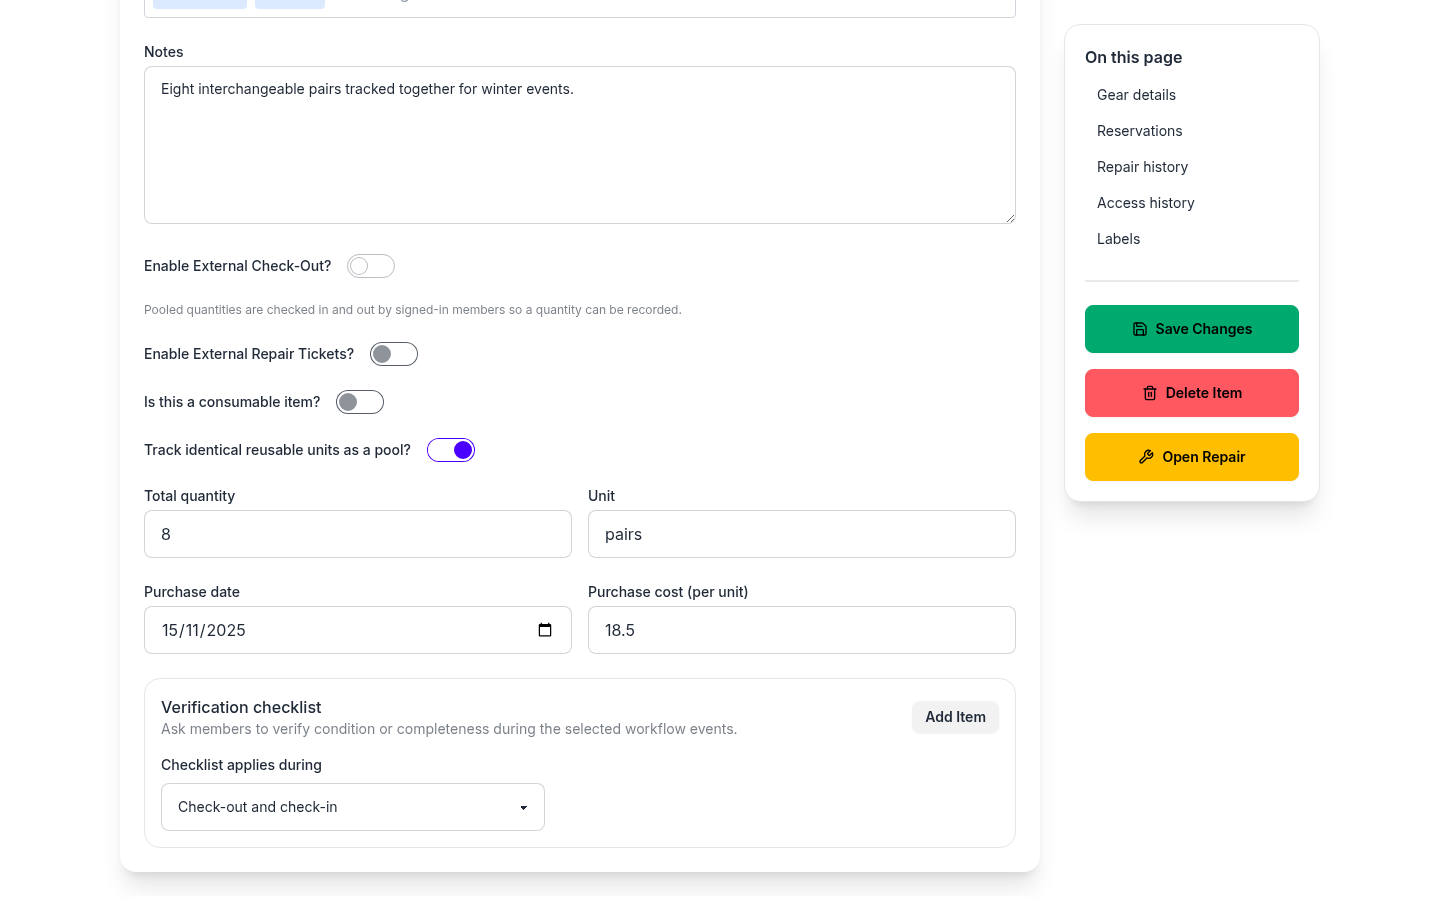
Purchase details
Every gear record can include an optional purchase date and purchase cost. Cost is per unit for pooled and consumable inventory; for individually tracked gear it is the cost of that item. These fields feed the financial columns in inventory reports.